
REVIEW · WEST BAY & EAST END DISTRICT TOURS
Cayman Island Eastern Districts Highlights
Starfish and shipwrecks in one half-day. This Eastern Grand Cayman tour mixes coastline viewpoints with real time in the water at Starfish Point, then finishes at Rum Point for classic sand and turquoise sea. Add in a guide who tells you what you are actually looking at, and the day feels more like a friendly local outing than a checklist.
I really like the guided storytelling, especially with guide Charm and driver Robert. The pacing stays relaxed, but the explanations are specific, including why key areas became famous. Charm also took extra care of a handicapped husband in our group, which made a big difference.
One thing to keep in mind is the timing. You get short visits at several stops, so if you want long, slow beach wandering at Rum Point, plan to savor it within that 45-minute window and keep your expectations realistic.
In This Review
- Key things that make this tour worth your time
- Why Eastern Grand Cayman feels like the real island
- Price and value, in plain terms
- Getting there: meeting points and why timing matters
- South Sound to Bodden Town: views, roads, and a historic stop
- East End classics: Blow Holes and the Ten Sail Memorial
- Starfish Point: wading time, photos, and what to expect
- Rum Point: sand, warm water, and a relaxed finish
- The drive back: scenic roads and a calm ending
- Group size, weather, and how smooth the day feels
- Who should book this Eastern Grand Cayman tour
- Should you book this Eastern Grand Cayman tour?
- FAQ
- How long is the Cayman Island Eastern Districts Highlights tour?
- What does the tour cost?
- What is included in the price?
- Are towels and sunscreen provided?
- What stops are included during the tour?
- Is hotel pickup available?
- What time does the tour start, and does it follow ship time?
- How many people are in the group?
- What happens if the weather is bad?
Key things that make this tour worth your time
- Starfish Point wading time: shallow water, great photo moments, and enough time to actually enjoy it.
- East End highlights in a tight schedule: Blow Holes plus the Wreck of the Ten Sail Memorial without wasting daylight.
- Local perspective from Charm and Robert: clear history and plenty of answers on the ground.
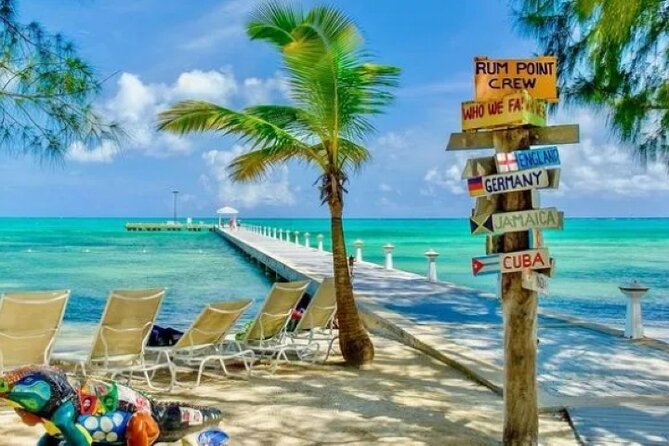
- Rum Point beach payoff: white sand, warm turquoise water, and a waterfront bar for a cold drink.
- Small-group feel: capped at 30 travelers, which helps the stops stay smooth.
District runs we reviewed, West Bay out to East End
Why Eastern Grand Cayman feels like the real island

Most Cayman days focus on the easy parts, then move on. This one goes the other direction, from George Town’s South Sound area to the island’s East End. The win here is variety in one 3.5-hour block: you get coastline scenery from the bus, then you get physical moments at the water stops.
The guides do a lot to connect the dots. When you are standing at Blow Holes and then looking toward the ocean again later, the explanations make the geography click. And when you reach the wreck memorial, you are not just seeing a sign, you are hearing why the site matters.
The Starfish Point segment is also the practical reason this tour works so well. Not everyone wants to rent a boat or spend a full day driving. This gives you a legitimate chance to wade in shallow water and see starfish where they naturally live, without turning the day into logistics.
Price and value, in plain terms
This tour costs $75.00 per person. That price includes an air-conditioned vehicle and a guided tour, plus stops at several major sights. You are also paying for convenience, because pickup is available along Seven Mile Beach, and the day is organized around a logical route across the island.
What is not included matters. You will want swimsuits and changing clothes since you are going in the water at Starfish Point and Rum Point, and towels and sunscreen are not provided. If you show up unprepared, you will end up spending extra for essentials, and that can erase some of the value.
Also, this tour is popular enough to average bookings about 57 days in advance. That is a good sign for availability, but it is also a reminder to book early if you are traveling in a busy season.
Getting there: meeting points and why timing matters
Start time is 10:00 am, and the tour runs on local island time, not ship time. That is important for cruise days, because your ship schedule can tempt you to leave too early or too late. Give yourself a buffer.
If you are on a cruise, you meet at Capt. Marvin’s Watersports check-in office in the Waterfront Centre. It is located about 1/2 to 2 blocks left of the cruise terminal. Plan to arrive at least 30 minutes before tour time.
If you are a stay-over guest and you want pickup, the tour offers complimentary pickup at hotels and condos along Seven Mile Beach. If you do not need pickup, meet at Capt. Marvin’s Watersports main office in Cayman Falls Plaza, across the street from the Westin on Seven Mile Beach.
One small but helpful detail: you get a mobile ticket, which tends to make check-in easier on a fast-moving morning.
- Stingray City Experience Plus Two Snorkeling Stops on Grand Cayman★ 5.0 · 1,477 reviews
- Night Bioluminescence Snorkel Tour★ 5.0 · 987 reviews
- Stingray City Experience Plus One Snorkeling Stop★ 5.0 · 577 reviews
- Private, luxury, custom charters to Stingray City, Snorkeling & More★ 5.0 · 488 reviews
- Small Group E-Bike Grand Cayman Ecological Half-Day Tour★ 5.0 · 416 reviews
South Sound to Bodden Town: views, roads, and a historic stop

You start your day in South Sound in George Town. From here, you get an early taste of the island’s contrasts, including passing by some of the more upscale areas along the coast. Even if you have only a short time in Cayman, that first drive helps you understand why people describe the water and coastline as a big part of the appeal.
Then the route continues past Old Crewe Road, where you pass by a local brewery area. You are not stopping for a tasting in this specific plan, but seeing that part of the island’s day-to-day culture adds texture beyond the typical tourist loop.
Next comes Bodden Town, with a quick stop at the Guard House of Bodden Town. It is only about 10 minutes, but the value is in using that time for orientation. This is your “get your bearings” stop for the day, and it gives you a historic reference point before you head deeper into East End.
If you are the type who likes photos, the short timing can be a plus. You can grab a couple of pictures without feeling like you are stuck. If you crave slow, immersive sightseeing, you may wish this stop ran longer.
East End classics: Blow Holes and the Ten Sail Memorial
Once you leave Bodden Town, the day turns toward East End.
First up is the Blow Holes. You get about 15 minutes here, and the main event is the ocean. You will see waves crashing through crevices in the rock, which is the whole point of the place. In other words, the “show” depends on the sea conditions. If the water is active, this stop can be dramatic. If it is calmer, it is still visually interesting, but you might not get the biggest splashes.
After Blow Holes, you move on to the Wreck of the Ten Sail Memorial. This stop is also about 15 minutes, and it is one of the spots where the guide really earns their fee. The explanation focuses on why this area became the most famous shipwreck, and in the field you can feel the difference between reading about something and hearing how locals connect it to the place.
Short stops can feel rushed, but these two together work well as a pair. The ocean energy at Blow Holes prepares you for the maritime story at the memorial. By the time you reach Starfish Point, you have a stronger sense of how the island’s shoreline shaped what happened here.
Starfish Point: wading time, photos, and what to expect
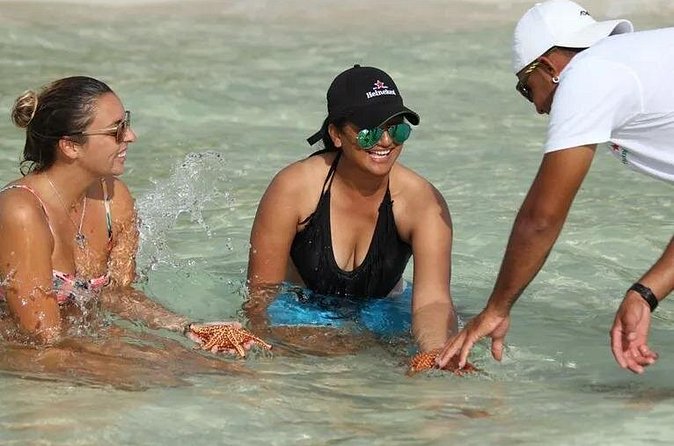
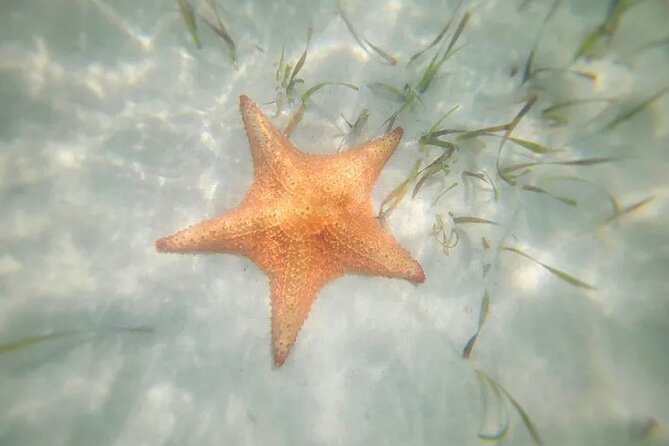
This is your signature water stop: Starfish Point, with about 30 minutes on site. The plan is straightforward. You wade into shallow water and look for starfish in their natural habitat. There is time for photos, and the shallow setting makes it easier than you might expect.
The practical tips matter here. Bring a swimsuit and changing clothes, because you will be in and out. Also bring your own sunscreen. Towels and sunscreen are not included, so plan for that before you arrive.
My advice: treat Starfish Point like a short window to enjoy the water, not like a beach day. With 30 minutes, you will get the best experience if you keep moving, take your photos early, and save your best spotting time for the middle portion of the stop.
Rum Point: sand, warm water, and a relaxed finish
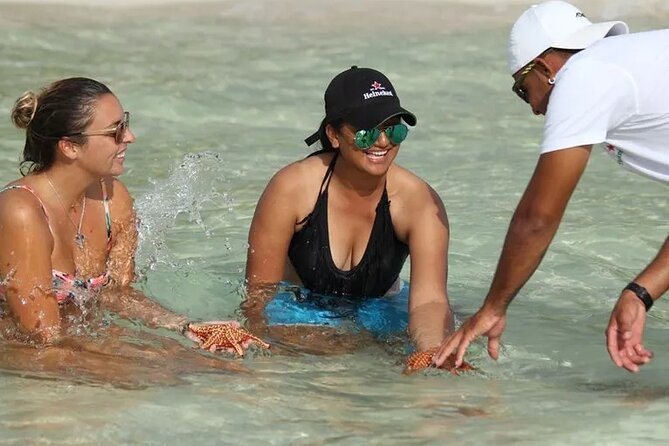
After Starfish Point, you head to Rum Point, with about 45 minutes. This is the payoff stop for beach lovers. Think soft white sand, warm turquoise water, and a relaxed pace where you can swim, sit, and reset.
Rum Point is also the water-sports friendly zone, so you might see people using the area for activities. If that is your thing, you can watch without committing. If you just want to relax, you can do that too.
There is a waterfront bar on site, and while the tour does not include drinks, it gives you an easy way to cool off. If you want something refreshing after sun and salt, this is when you do it.
With only 45 minutes, the best strategy is to pick your plan on arrival:
- If you want to swim, go early in the stop.
- If you want photos and lounging, claim a spot, then swim for a shorter burst.
Either way, you will be glad you prioritized what matters to you, because once it is time to board, you are heading back.
The drive back: scenic roads and a calm ending

After Rum Point, you get back on the bus for the return trip along scenic coastal roads. This part is less about “another stop” and more about processing the day.
You get the views again through the window, and you also get time to review what you saw while it is still fresh. It is a smart way to end a half-day tour, because it helps the island story stick.
The activity ends back at the meeting point, so you are not forced into an unfamiliar area or an extra transfer. From there, you can go back to your hotel or arrange dinner.
Group size, weather, and how smooth the day feels
The group is capped at 30 travelers, and there is a minimum of 6 to run the tour. In practical terms, that tends to keep the day from feeling chaotic at the stops. You should still expect a guided group rhythm, since the timing between sights is tight.
Weather matters. This tour requires good weather. If it gets canceled due to poor weather, you will be offered a different date or a full refund.
If you are planning around cruise arrival, the local time detail is extra important. Your ship schedule might not match the island clock, so stay flexible and let the tour timing lead.
Who should book this Eastern Grand Cayman tour
This is a strong choice if you want an island feel without renting a car, and you like a mix of nature plus a little history.
I think it fits best for:
- People who want Starfish Point and Rum Point but do not want a full-day commitment
- First-time Cayman visitors who want a wide snapshot across different districts
- Families and couples who appreciate a guided route and don’t mind shorter stop times
- Anyone who values clear explanations, especially since guides like Charm and Robert are known for being friendly and thorough
If you are the type who hates time limits and wants to spend an hour or two at each beach spot, this might feel like “just enough, then gone.” But if you like variety and hate wasting half a day on transit, it is a smart format.
Should you book this Eastern Grand Cayman tour?
Yes, you should book it if you want one organized outing that hits the core “wow” moments: starfish in shallow water, the Blow Holes ocean show, a Ten Sail shipwreck memorial stop, and real beach time at Rum Point. The value is best when you show up prepared with the right swim gear and sunscreen, and when you treat the schedule as an efficient half-day sampler.
Skip it only if your top priority is a long, slow beach retreat. In that case, you might do better with a standalone beach afternoon instead of trying to fit multiple coastline highlights into 3 hours 30 minutes.
FAQ
How long is the Cayman Island Eastern Districts Highlights tour?
It runs for about 3 hours 30 minutes.
What does the tour cost?
The price is $75.00 per person.
What is included in the price?
You get an air-conditioned vehicle and a guided tour.
Are towels and sunscreen provided?
No. Towels and sunscreen are not included. You should also bring swimsuits and changing clothes.
What stops are included during the tour?
The tour includes stops at Bodden Town (Guard House), Blow Holes, Wreck of the Ten Sail Memorial, Starfish Point, and Rum Point, plus scenic driving through South Sound and along the route.
Is hotel pickup available?
Yes. There is complimentary pick-up at hotels or condos along Seven Mile Beach. If you are not using pick-up, you meet at the Capt. Marvin’s Watersports main office at Cayman Falls Plaza across from the Westin.
What time does the tour start, and does it follow ship time?
The tour starts at 10:00 am and operates on local island time, not ship time.
How many people are in the group?
The tour has a maximum of 30 travelers and requires a minimum of 6 to go.
What happens if the weather is bad?
The tour requires good weather. If it is canceled due to poor weather, you will be offered a different date or a full refund.
More Cayman Islands Write-Ups
- Stingray City Experience Plus Two Snorkeling Stops on Grand Cayman
★ 5.0 · 1,477 reviews - Starfish Point, Stingray City & Coral Garden (3-STOP Adventure)
★ 4.5 · 1,168 reviews - Night Bioluminescence Snorkel Tour
★ 5.0 · 987 reviews - Stingray City Experience Plus One Snorkeling Stop
★ 5.0 · 577 reviews - Private, luxury, custom charters to Stingray City, Snorkeling & More
★ 5.0 · 488 reviews
Around the Districts: West Bay to East End
- West Bay Sightseeing Tour Plus Seven Mile Beach Visit
★ 4.0 · 225 reviews - 3HR Full Island Life Jetski Tour
★ 4.5 · 85 reviews - East End Activities and Tour in Grand Cayman
★ 4.5 · 14 reviews - Airport Transfer to West Bay Accommodations (GCM)-Round Trip
★ 3.5 · 5 reviews - Airport Transfers to East End Accommodations (GCM) – Round Trip
★ 5.0 · 3 reviews
Fresh off the review pile in Grand Cayman
West Bay & East End District Tours, compared.
 ★ 4.0West Bay Sightseeing Tour Plus Seven Mile Beach VisitFrom $64225 reviews
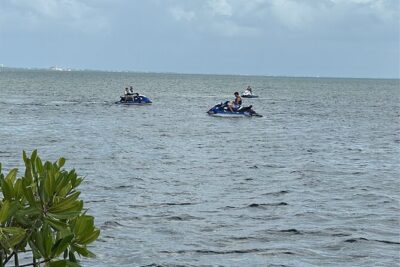 ★ 4.53HR Full Island Life Jetski TourFrom $39585 reviews
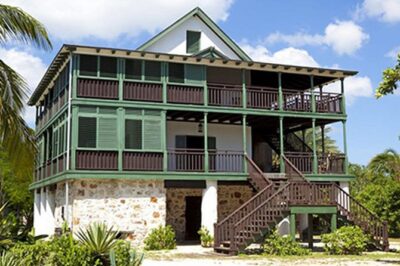 ★ 4.5East End Activities and Tour in Grand CaymanFrom $15714 reviews
 ★ 3.5Airport Transfer to West Bay Accommodations (GCM)-Round TripFrom $805 reviews
 ★ 5.0Airport Transfers to East End Accommodations (GCM) – Round TripFrom $4183 reviews
Browse the lists this tour appears in